
We've had our eye on some very cute scrunchie-style bags on our Pinterest feed recently, perfect for a new downloadable DIY! This bag is a beginner-friendly project that requires less than a metre of fabric so would make a great scrap buster for any offcuts you've kept from previous makes. We think it would be a fun gift for DIY lovers too! Join us below for a breakdown of the steps + a downloadable template to make your own.

What You'll Need
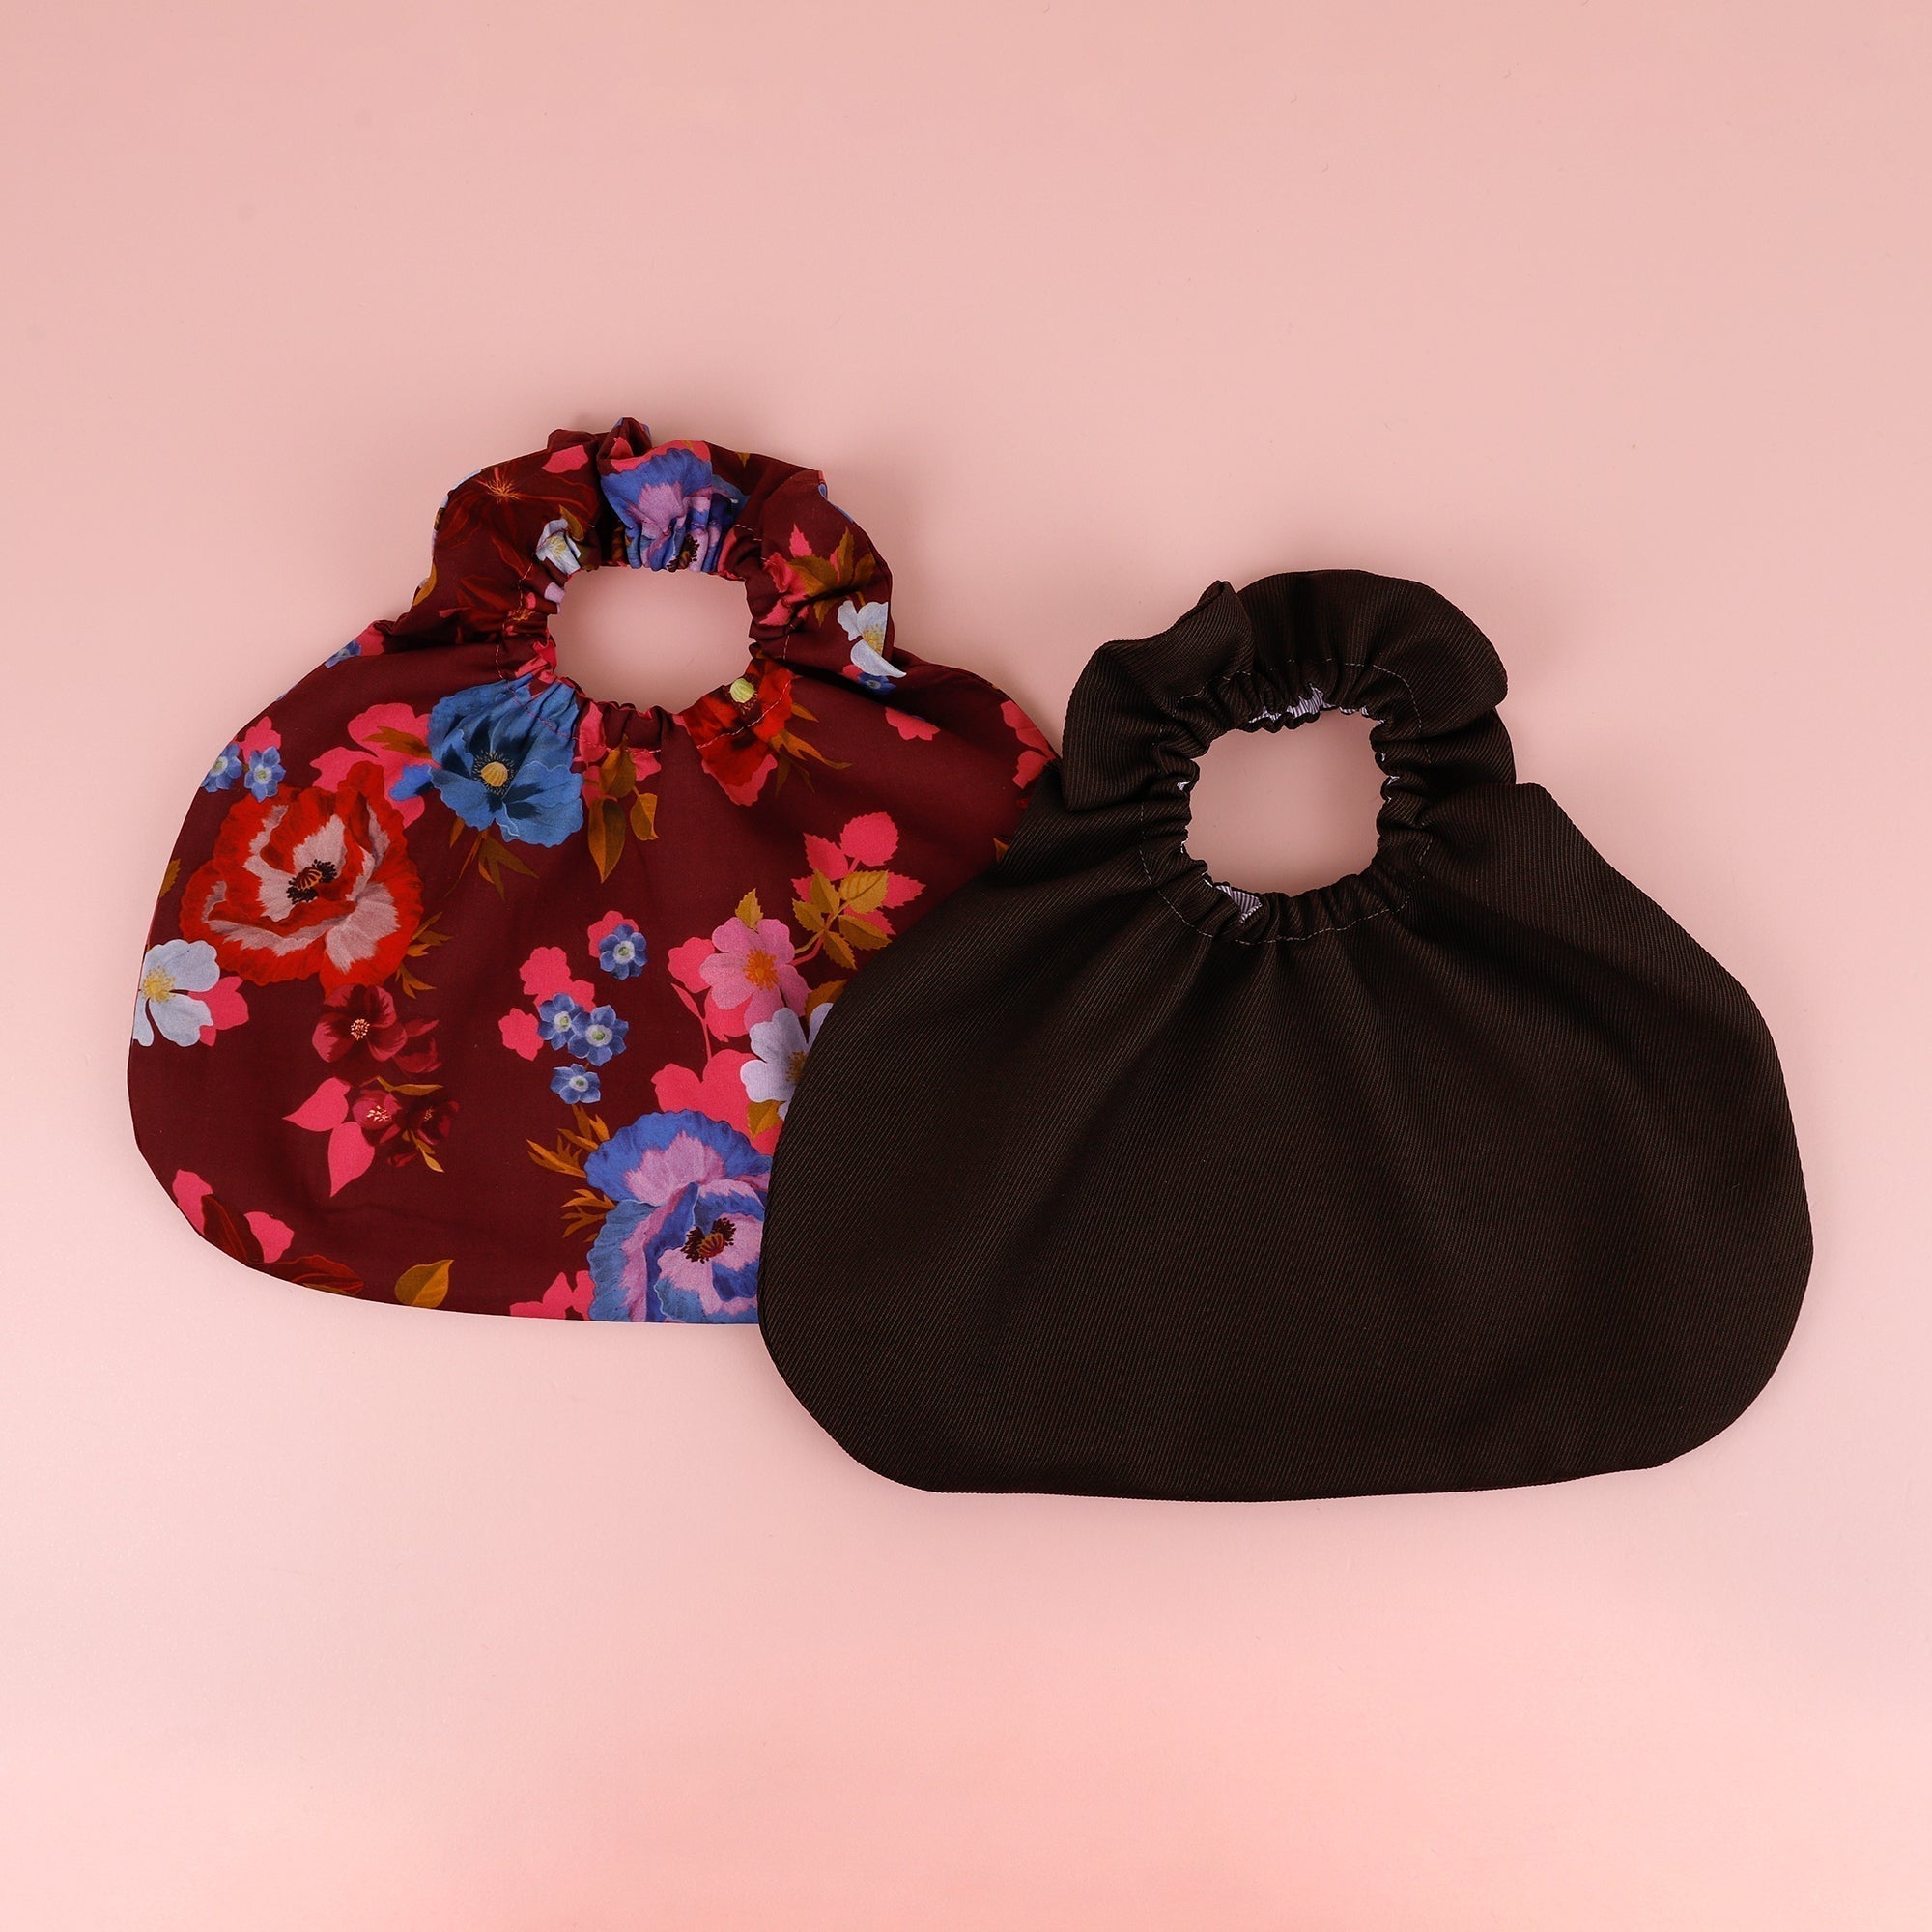
Download the free TFS Scrunchie Bag pattern from our online store here. This little bag best suits non-stretch woven fabrics! To make a bag in a small size like ours, you'll need approximately 50cm (for 150cm wide fabrics) or 90cm (for 120cm wide fabrics) of your chosen main fabrics and lining fabrics. We tried a lightweight Liberty Tana Lawn cotton, and a heavier Wool Blend Twill Suiting in the colour Undergrowth paired with a purple Micro Stripe Cotton Shirting for the lining. You'll also need approximately 25cm of a 3mm wide elastic, and if you wish to reinforce your main fabric, you'll also need some fusible interfacing.
You'll also need a spool of matching thread, a pair of sewing scissors and a sewing machine. 

Step 1 - Before you get stuck in
Stick together the pages of the PDF pattern and cut out the paper pattern pieces.
If you are using interfacing to reinforce your fabric, now is the time to iron fusing to your outer bag fabric before cutting out the pattern pieces.
Cut out all pattern pieces in your chosen fabric.

Step 2 - Attaching the pocket
Fold in and press 1cm from each side of the pocket. On the top edge, fold the fabric down 3cm and press.
Stitch along top folded edge.
Pin the pocket in place on one of the lining pieces and stitch in place. 
Step 3 - Sewing the handle
Take one outer bag piece and one lining piece, putting the right sides of the fabric together and matching the notches, pin together around the handle opening.
Sew 1 cm from the inner edge of the handle all the way around.
Clip the seam allowance around the circular handle.
Turn right-sided out by pushing one side through the handle and press to finish.
Repeat on other side.
Step 4 - Creating a channel for the elastic
On the right side of the fabric, starting at the bottom of the handle, sew about 1.5cm from the pressed edge of the handle — as you come round to where you started sitting stop about 3cm from where you began. This gap is where you will feed the elastic through later on.
Repeat on the other side.
Step 5 - Sew the lining together
Take both sides of the bag, placing the lining pieces together. Be sure to match the notches!
Fold back the outer fabric and pin the lining pieces together. Starting at the bottom of the bag stitch with a 1cm seam allowance the lining together, stop again about 6cm from where you started — leaving a 6cm unstitched gap at the bottom of the bag.
Trim the seam allowance, but leave the seam allowance untrimmed where the 6cm gap is.
Step 5 - Using the burrito method to sew the outer fabric together
Lay the bag flat and start rolling it up from the left side to the right. 

When you have nearly rolled the whole bag up, fold the outer bag fabric back around the roll so the right sides are facing each other. 
Match up the notches and pin one side of the bag in place.

Sew (with a 1cm seam allowance) from the notch at the top of the handle down to the bottom of the bag, stop somewhere along the bottom. Be careful not to sew the bag rolled up in the middle.
Clip the seam allowance around the curved edge of the handle and then pull the bag through the bottom so the right side is facing out.
Repeat on the other side, rolling the sewn edge toward the side that is finished.
Fold the outer bag fabric back around the roll, match the notches and pin. 
This time you will sew from the top notch all the way round to where you stopped, closing the bag. Use the 6cm gap you previously made in the lining to turn the bag completely right side out.
Step 6 - Threading the elastic
Cut two lengths of elastic about 25cm long each.
Attach a safety pin to the elastic and going through the 6cm hole in the lining find the 3cm unstitched gap at the bottom of the handle. Turning the bag inside out may make this part easier.
Feed the elastic through the channel around the handle. It’s a good idea to pin the other end to the bag somewhere so it doesn’t get sucked through.
Once fed all the way through, sew the ends of the elastic together and even out the gathers.
Repeat on the other side.
Turn the bag right side out and sew the 3cm gap in the handle closed on the right side of the fabric.
Step 7 - Finishing
Sew the gap in the lining closed with a neat topstitch or invisible hand stitch.
Press the whole bag to finish. Voila! Your bag is complete.
How cute are these bags?! Small simple bags like these make for a super fun group activity - gather some pals and pull out your scrap stashes, share the details with us over on Instagram!